
Traditional French Canelés Recipe from Bordeaux is one of those treats I used to overpay for at fancy bakeries because I assumed it was too fussy to make at home. You know the feeling, you bite into that deep caramel crust and then you hit the soft, custardy middle, and suddenly you want six more. The good news is that they are not hard, they are just picky about a few steps. Once you understand the rhythm, it becomes a relaxing little project. And honestly, the smell of vanilla and rum drifting through your kitchen is worth the wait. 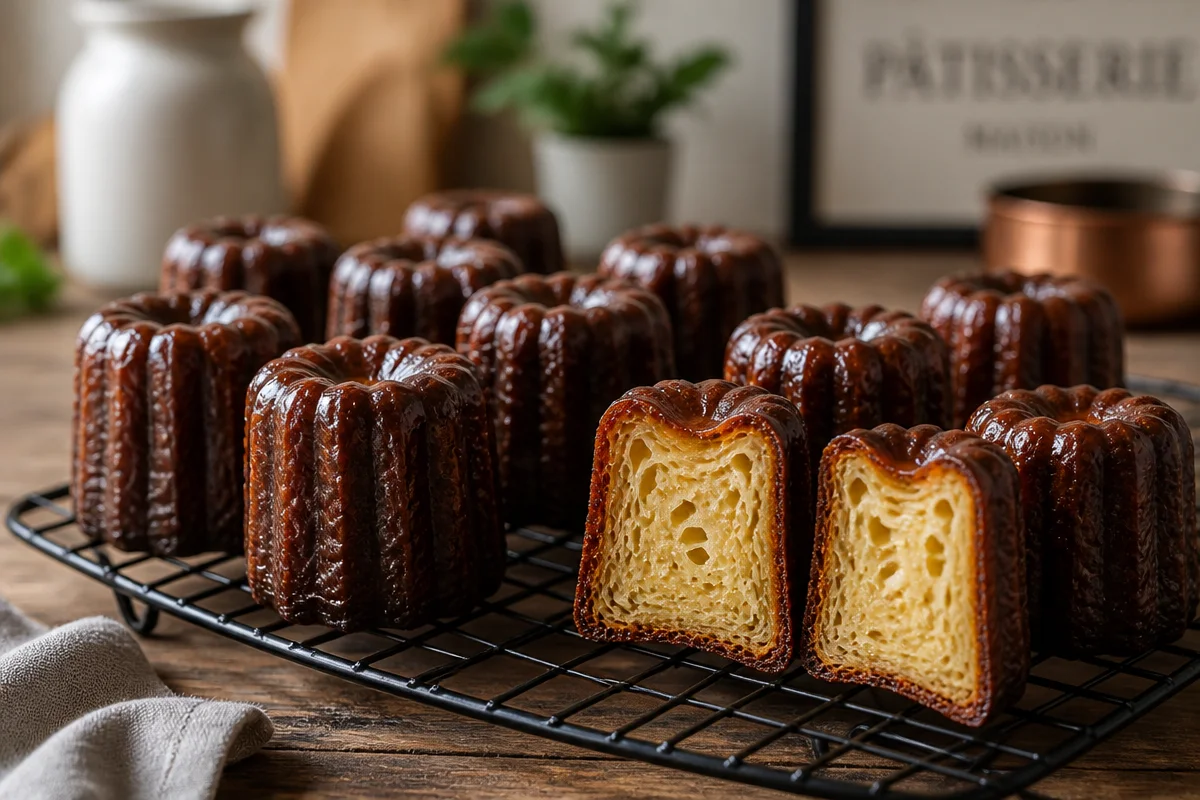
Going for canele authenticity – using copper molds
If you want that classic crackly shell, copper molds are the gold standard. They heat fast, they heat evenly, and they help build that dark, glossy crust that makes canelés look like tiny edible jewels. Silicone molds are easier and cheaper, and they can still taste great, but the exterior usually comes out lighter and a bit less crisp.
I started with silicone because I was scared of spending money on molds. Then I tried copper and I got it. The difference is real, especially if you love that bold, caramelized edge. If you are the kind of person who hunts for the best croissant or judges a pastry by its crust, you will appreciate copper.
What you will need for the classic setup
- Copper canele molds (traditional size or mini, both work)
- A small brush for coating the molds
- A fine strainer for the batter
- A kitchen scale if you have one (helpful but not required)
Quick note on sizing: minis bake faster and are a little easier to “nail” because the centers set sooner. Traditional larger canelés are the dream, but they can be slightly trickier the first time. If you are already comfortable with baking, go traditional. If you want training wheels, go mini for batch one.
Also, if you are in the mood for another iconic French classic that is way more dinner than dessert, I love making this savory traditional French duck confit recipe on weekends when I want to feel like I live in a tiny countryside kitchen.
Coating canele molds with beeswax and butter mix
This step is where a lot of people either skip or get confused, so let’s make it simple. Traditional canelés use a beeswax and butter mix inside the molds. It helps with release, it boosts that signature shiny finish, and it encourages the crust to caramelize properly.
You can buy “white beeswax pellets” online or at a local shop that sells soap or candle supplies. Make sure it is food safe. Once you have it, it lasts a long time because you use a small amount per batch.
My easy beeswax ratio
I like a simple blend that spreads well:
- 50 grams beeswax
- 50 grams unsalted butter
Melt them together gently, either in a small pan on low heat or in short microwave bursts. Stir until fully smooth. Then, while it is still liquid, lightly brush the inside of each mold. You want a thin coat, not puddles. If you overdo it, your canelés can fry a bit at the edges and the crust can get thick in a not so pleasant way.
After brushing, set the molds upside down on a rack or tray so extra drips out. Some people chill the molds to set the coating faster. I usually do, especially in a warm kitchen. Ten minutes in the fridge is plenty.
“I thought the beeswax step was overhyped, but it totally changed my results. The canelés popped out cleanly and the crust finally looked like the bakery ones.”
Techniques
This is the part where you win or lose the vibe. The batter is basically a thin custard batter, and canelés bake in a way that feels dramatic: high heat first to form the crust, then lower heat to cook the inside without burning the outside.
Here is my go to Deliciously Easy Traditional French Canelés Recipe from Bordeaux formula. It is friendly for home kitchens and still gets that classic texture.
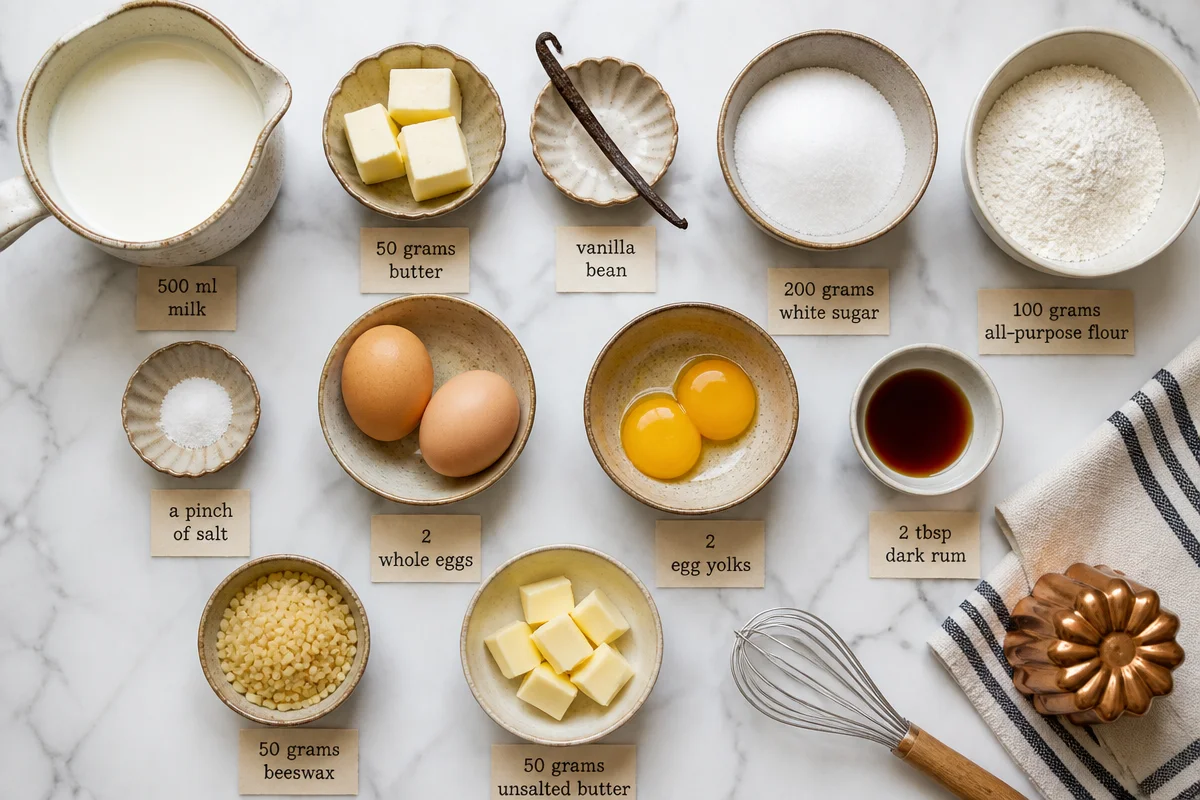
Ingredients
- 500 ml milk
- 50 grams butter
- 1 vanilla bean (or 2 tsp vanilla extract)
- 200 grams white sugar
- 100 grams all purpose flour
- 2 whole eggs
- 2 egg yolks
- 2 tbsp dark rum (optional but very traditional)
- Pinch of salt
Directions
- Scald the milk with butter and vanilla (details in the next section).
- In a bowl, whisk sugar, flour, and salt.
- Add eggs and yolks, whisk gently. Do not whip air into it like a cake batter.
- Slowly pour in the warm milk mixture while whisking. Take your time so it stays smooth.
- Stir in rum and strain the batter. This helps remove lumps and any bits of egg.
- Cover and rest in the fridge (resting is not optional if you want the right texture).
- Preheat oven to 230 C or 450 F. Place coated molds on a baking tray.
- Fill molds about 85 to 90 percent full. The batter rises, so do not fill to the top.
- Bake 10 to 15 minutes at high heat to set the crust.
- Lower to 180 C or 350 F and bake 45 to 60 minutes more, depending on mold size.
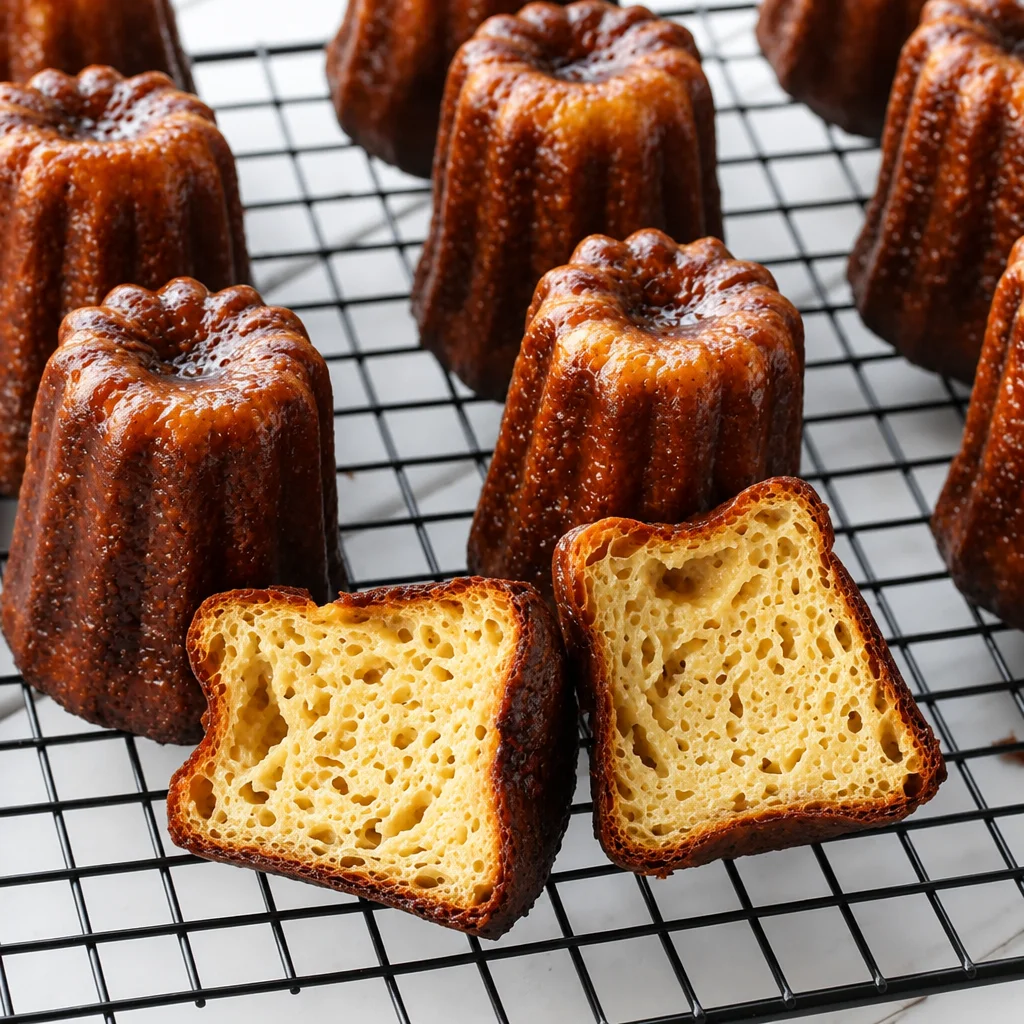
- They should be deep brown, almost like a dark caramel color. Pale canelés are usually soft and a little sad.
- Unmold while hot by flipping them out onto a rack.
This is also where your oven personality shows up. Some ovens run hot, some run cool. If your first batch is too light, bake longer. If they are getting too dark too fast, lower the temperature a bit earlier. I keep notes like a nerd, because once you find your sweet spot, your Deliciously Easy Traditional French Canelés Recipe from Bordeaux becomes repeatable.
One more fun French food detour: if you want a cozy dessert on a different day, this traditional French tarte Tatin recipe is perfect when you have apples that need using.
How to Scald Milk
Scalding milk sounds intense, but it is basically just heating it until it is hot and steamy, without boiling it like pasta water. For canelés, scalding helps the vanilla infuse and it melts the butter smoothly into the milk.
Here is how I do it:
- Pour milk into a saucepan and add butter.
- If using a vanilla bean, split it and scrape the seeds in, then toss in the pod too.
- Heat on medium until you see steam and tiny bubbles around the edge.
- Turn off the heat before it boils hard.
- Let it sit 5 minutes so the vanilla flavor settles in.
If you accidentally boil it, it is not the end of the world, but let it cool a bit before mixing with eggs so you do not scramble them. Warm is good. Boiling hot is stressful.
And if you are planning a full French theme meal, I love pairing a cozy soup or seafood dinner with pastry experiments. This deliciously simple traditional French bouillabaisse recipe is such a mood for a slow Saturday.
How Long Should Canel Batter Rest?
This is the secret handshake of canelés. Resting the batter in the fridge helps the flour hydrate and lets the bubbles settle down. The result is that smoother interior with the custardy bite, plus a more even bake.
My rule: rest at least 24 hours. If you can do 48 hours, even better. I know waiting is annoying. But this is exactly why people think canelés are hard. They rush the rest, then wonder why the texture is off.
Here is my realistic schedule:
- Day 1 evening: make batter, strain, refrigerate.
- Day 2 evening: bake and feel proud of yourself.
Before baking, give the batter a gentle stir. You might see a layer settled at the bottom. That is normal. Do not whisk hard and create foam. Foam leads to weird bubbles and less clean looking canelés.
When you finally bake them, remember: canelés are best the day they are made. The crust softens over time. If you have leftovers, pop them in a hot oven for a few minutes to bring back some crunch. This is also why I love making a smaller batch of my Deliciously Easy Traditional French Canelés Recipe from Bordeaux more often instead of one huge batch that sits around.
Common Questions
Why did my canelés stick to the molds?
Usually it is not enough coating, or the coating was uneven. Copper molds plus a thin beeswax and butter layer helps a lot. Also unmold them while they are hot.
Can I make canelés without rum?
Yes. You can skip it or replace with a tiny splash of extra vanilla. Rum adds that classic Bordeaux bakery taste, but it is not required.
What color should they be when done?
Deep brown, like dark caramel. If they are light tan, they usually will not have the right crust. This recipe rewards bravery with color.
Do I really need to rest the batter overnight?
Yes if you want the real texture. Resting is a big part of what makes a Traditional French Canelés Recipe from Bordeaux feel authentic instead of just a cupcake pretending to be fancy.
Can I freeze canelés?
You can, but they lose that special crust. If you do freeze them, reheat in a hot oven straight from frozen until crisped up.
A sweet little wrap up before you bake
If you take anything from this post, let it be these three things: use a good mold if you can, do the beeswax coating, and give the batter time to rest. That combo is what turns a decent bake into the real deal with the crackly shell and custardy middle. If you want to go deeper on the tiny details, I learned a lot from Perfect Canele – Taste of Artisan and this super helpful guide on How to make Cannelés de Bordeaux (Canelés recipe and technique). Now go plan your baking window, clear some fridge space, and try this Traditional French Canelés Recipe from Bordeaux at least once. When you pull that first glossy little pastry from the mold, you will feel like you just won something.
Traditional French Canelés
Ingredients
Method
- Coat the canelé molds with a thin layer of the melted beeswax and butter mixture. Set molds upside down to allow excess to drip out.
- In a saucepan, scald the milk with butter and the seeds from the vanilla bean.
- In a bowl, whisk together the sugar, flour, and salt.
- Add the eggs and yolks and whisk gently to combine, avoiding incorporating air.
- Slowly pour the warm milk mixture into the egg mixture while whisking to keep the batter smooth.
- Stir in the rum, if using, and strain the batter to remove lumps.
- Cover the batter and rest in the refrigerator for at least 24 hours (48 hours recommended).
- Preheat the oven to 230 C (450 F) and place the coated molds on a baking tray.
- Fill the molds about 85 to 90 percent full with batter.
- Bake at high heat for 10 to 15 minutes to set the crust.
- Lower the oven temperature to 180 C (350 F) and bake for an additional 45 to 60 minutes until deep brown.
- Unmold the canelés while hot and allow to cool on a rack.